Monday, March 28, 2011

Window Valance

My husband and I picked out some asian fabric for window valances or drapes or something several years ago and then sat and sat and sat.... SO.... I decided it was time to do something with it!  I decided what shape of valance I wanted, made sure that he liked what I was doing and then taped about six pieces of paper together to make my pattern.  It took a lot of pencil and eraser work, but I finally liked my final result.  I laid the fabric out and cut the fabric out and then sewed it up!  I took some tassels off an asian table runner that we had and sewed them into the valance for some flair.  The longest part of this was making the pattern.  It sewed together rather quickly and then we put the curtain rods up, (they have also been sitting for several years) and that was the second longest part of the whole project.  And... now we have our window valances!
Happy Crafting!

Wednesday, March 23, 2011

Sweater Purse, Wallet and zipper bag

I saw this great tutorial on how to turn a sweater into a purse here:
http://www.makeit-loveit.com/2010/11/re-purposing-sweater-into-sling-purse.html
So I made my own, with a couple of revisions:
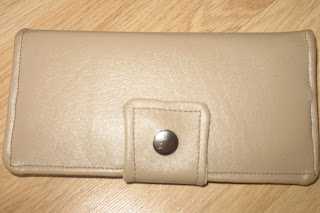
I also needed a new wallet and found this AWESOME tutorial here:


 I used my mess up zipper (I just did the wrong fabric for the zipper) and decided to make a zipper bag for all the junk I have in my purse:
Happy Crafting!

Sunday, March 20, 2011

Koi Fish Pond Table Cloth

We have a black dinning room table and my son has been destroying it by banging his silverware on it.  I have been trying to figure out what to do.  We use place mats, but it has become fun for him to move the place mat around, throw it on the floor, etc...  So I thought about get black vinyl and making a cute table cloth out of it, but when I got to the store, I decided to try something different.  I used this picture that hangs in our dinning room for inspiration and decided to make a Koi fish pond table cloth and get clear vinyl to cover it. (The clear vinyl was my mom's idea)
I might add more smaller Koi fish, but for now, it is finished :)

 The next morning we showed my son our Koi fish pond and he thought it was the coolest thing!
Happy Crafting!

Friday, March 18, 2011

Stuffed toys

My friend wanted to make some special gifts for her two boys.  One boy loves the Star from Mario Galaxy.  So we made a star and it looked just like one that you would have to buy for $25.  We made her other baby boy a tag dinasour.  I got the ideas on how to make them here:
Happy Crafting!

St. Patrick's Day Ribbon t-shirts

So once again, we made Ribbon t-shirts.  It is so much fun!  Our group of people wanting shirts is growing as well!  The fifth picture down was made for my 9 year old nephew and it did not look feminine at all with the ribbon on it.  It had a flag effect.  He even wore it to school.  The first two pictures were taken before the mom's added yellow buttons for the gold in the pot.  The two rainbows got some buttons added to the beginning of the rainbows as well.  We had so much fun making them together!
Once again, here is the blog where I got the idea:


Happy Crafting!

Rainbow cupcakes with golden sprinkles

For St. Patrick's Day, a friend and I made Rainbow cupcakes with cream cheese frosting and golden sprinkles.  They were so delicious!  I found the idea here:
Yes, my cupcakes look nothing like hers, but hey, it was a first attempt and I put way too much of one color batter in the liner, so I wasn't able to make them as nice as hers.  (Just learn from my mistake :)
No matter how they turned out, you got the basic idea and they tasted fabulous!

Happy Crafting!

Thursday, March 17, 2011

Cardboard guitars

I found this tutorial in one of my favorite blogs:
We happened to have a cardboard box just perfect to make one!

Happy Crafting!

Crayon roll

I was looking through one of my favorite blogs and saw this:
My son got some crayons for Christmas and I decided to make my own.  I absolutely love it and he loves to put the crayons in and out of the pockets.  I just recommend that if you make it larger than the one in the tutorial (like I did), to increase the ribbon size (which I forgot to do).  It still ties in one knot, but does not make a nice bow.
Happy Crafting!

Rosette decor

While looking through fun Valentine tutorials, I found this one:
And this is what I made
Happy Crafting!

Valentine Ribbon t-shirts

I found this cool tutorial here:
http://www.flamingotoes.com/2010/04/ribbon-flower-t-shirt/
and decided that it would be fun to make Valentine ribbon t-shirts.  The women in my family close by got together and we made these shirts together.


Happy Crafting!

Be My Valentine Banner

I don't have a tutorial for this one as I made it myself.  I took a heart stencil and traced out 13 hearts of one fabric for the back, 7 of another and 6 of the other.  Then I found a font I liked in word and printed the letters out (using light gray ink).  I cut the letters out of the paper and then pinned them onto light pink felt.  I then cut them out of the felt.  Once I did that, I sewed the letters onto each heart.  Then, I carefully pinned each heart, front and back along the ribbon.  I then sewed around the outer edge of each heart. 
Yes, this took a lot of time, but I loved it so much, I had a hard time taking it down when March rolled around :)

Happy Crafting!

Cat in the Hat hat

My Brother-in-law called me up a few weeks ago and asked me if I could make a cat in the hat hat for Dr. Suess day at his son's school.  So... I did.  I had an idea on how to make it, but then decided to search for felt hat making and found this:
I added the fith layer and used stabilzer to make it nice and stiff.  It turned out great!

Happy Crafting!

Laptop bag

For Christmas, I made my Sister a laptop bag.  I found this tutorial here:

You will have to convert her measurements, but it was a good tutorial.

Happy Crafting!

Making a Baby Tie

This winter I wanted to snazz up my son's Sunday wardrobe.  So I searched for a baby tie tutorial  I found this one:
And this is what I made for my son.
Happy Crafting!

Children's Hooded Towels

I made a monkey towel for my son.  Then I made a monkey towel for a friends son and added some ears to that one.  Then I helped a friend make Mario and Luigi towels for her boys.  As you can see in the picture, the hoods are big enough for children with larger heads.


These hooded towels are really easy to make, just purchase a towel and hand towel at a discounted store.  I got mine at Ross and found even better prices at Burlington Coat Factory.  I used craft felt to make the eyes and nose of the monkey and the white parts of the Mario and Luigi towels.  They are wonderful!

Here is a tutorial that I found to make simple hooded towels.  I did not put the pleating in the back of mine, because I feel that it make the towel smaller for wrapping.  If you want something more creative, just search "hooded towel tutorial"  
Happy crafting.

http://www.infarrantlycreative.net/2008/02/kids-hooded-towel-tutorial.html